Create EC2 Instances for Bastion Host and Backend
Initialize EC2 Instances
ℹ️ Objective
- Initialize two separate virtual servers (EC2 Instances):
- Bastion Host: Placed in the Public Subnet to act as a “jump box,” helping us securely connect to resources in the Private Subnet.
- Backend Instance: Placed in the Private Subnet to run the application, protected from direct access from the Internet.
🔒 Execution Steps
First, we will initialize the EC2 Instance for the Bastion Host.
1. Create EC2 Instance for Bastion Host (project-bastion-host-ec2)
Step 1: Start Launching the Instance
- In the AWS Management Console, find and select the EC2 service.
- From the EC2 Dashboard, click on Launch instance.
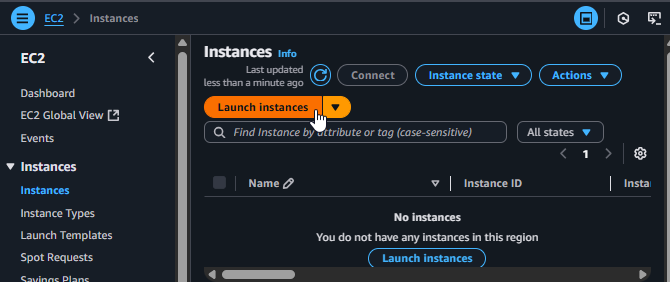
Start Launching Instance
Step 2: Set Name and Choose AMI
- Name:
project-bastion-host-ec2 - Application and OS Images (Amazon Machine Image): Select Amazon Linux.
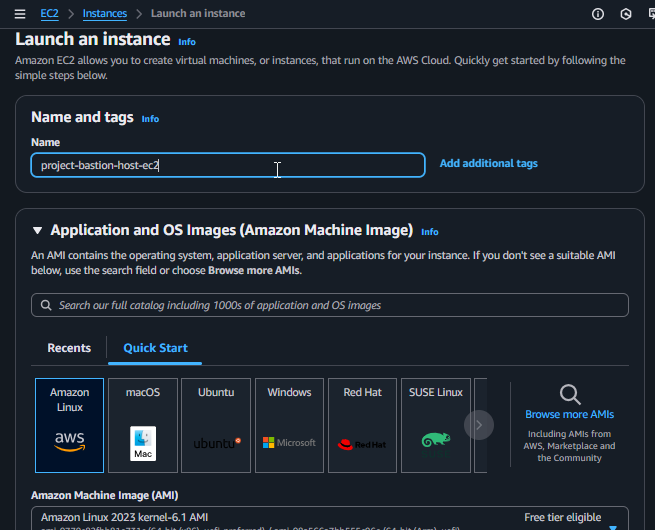
Setting the name and choosing the Amazon Machine Image
- Name:
Step 3: Choose Instance Type
- Instance type: Select
t2.micro(part of the Free Tier).
- Instance type: Select
Step 4: Create a Key Pair for Access
- This is a crucial step to be able to SSH into the instance.
- Click on Create new key pair.
- Key pair name:
project-keypair - Key pair type:
RSA - Private key file format:
.pem - Click Create key pair, and the browser will automatically download the
.pemfile.
**IMPORTANT:** Store this `.pem` file in a safe place. You will not be able to download it a second time. If you lose it, you will lose access to your EC2 instance.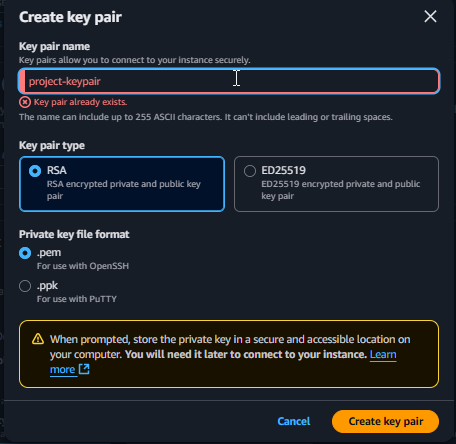
Creating a new Key Pair
Step 5: Configure Network Settings
- Click on Edit in the Network settings section.
- VPC: Select the
project-vpcyou created. - Subnet: Select one of the two Public Subnets (e.g.,
...public-subnet-ap-southeast-1a). - Auto-assign public IP:
Enable. - Firewall (security groups): Select Select existing security group and choose
project-bastion-host-sg.
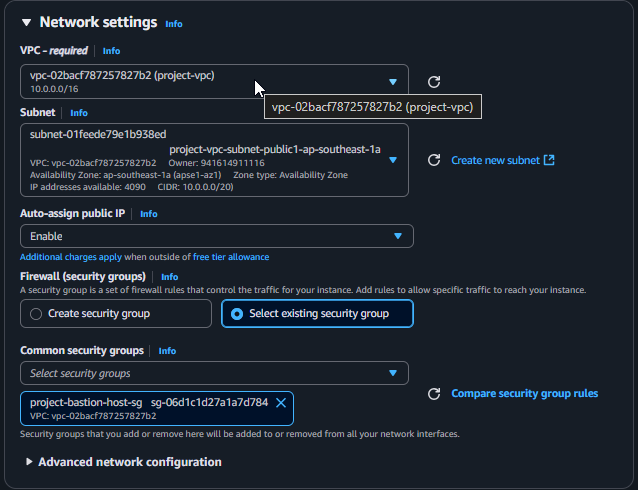
Configuring network settings for the Bastion Host
Step 6: Launch the Instance
- Review the information in the Summary panel.
- Click Launch instance.
2. Create EC2 Instance for Backend (project-backend-ec2)
Next, we will repeat the process to create the Backend instance, with a few important changes in the Network Settings.
Step 1: Start Launching the Instance
- From the EC2 Dashboard, click Launch instance again.
Step 2: Set Name and Choose AMI
- Name:
project-backend-ec2 - AMI: Select Amazon Linux.
- Name:
Step 3: Choose Instance Type
- Instance type: Select
t2.micro.
- Instance type: Select
Step 4: Select the Existing Key Pair
- In the Key pair (login) section, select the
project-keypaircreated earlier.
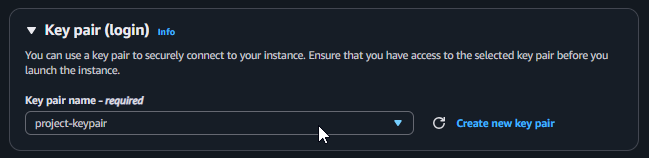
Selecting the existing Key Pair
- In the Key pair (login) section, select the
Step 5: Configure Network Settings
- Click on Edit in the Network settings section.
- VPC: Select
project-vpc. - Subnet: Select one of the two Private Subnets (e.g.,
...private-subnet-ap-southeast-1b). - Auto-assign public IP:
Disable. This is a key difference to protect the backend server. - Firewall (security groups): Select Select existing security group and choose
project-backend-sg.
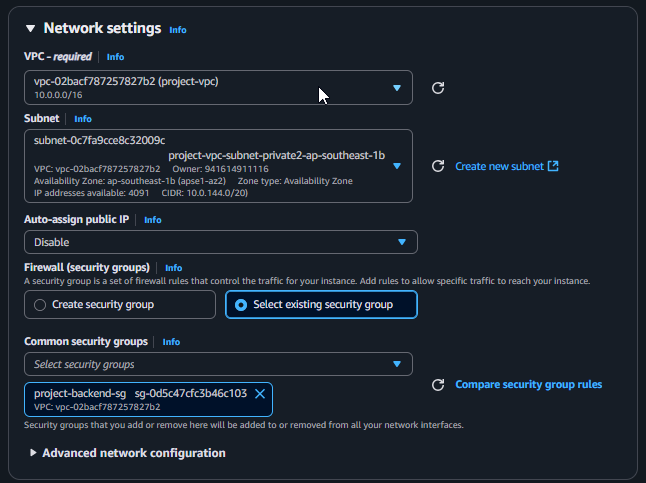
Configuring network settings for the Backend Instance
Step 6: Launch the Instance
- Review the information and click Launch instance.
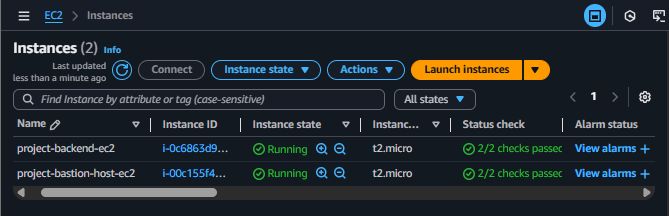
After completing, you can click View all instances to see both newly created servers in the Running state.