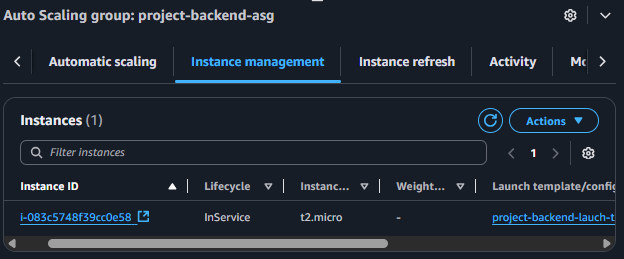
Create Auto Scaling Group
Initialize Auto Scaling Group (ASG)
ℹ️ Objective
- The Auto Scaling Group (ASG) is the heart of a flexible and scalable architecture on AWS.
- Its job is to automatically adjust the number of running EC2 instances to meet current traffic demands. When traffic increases, the ASG will automatically add new instances (Scale Out). When traffic decreases, it will automatically remove unnecessary instances (Scale In) to save costs.
- We will configure an ASG that uses the created Launch Template to know how to create instances, and attach it to the Load Balancer to know when to create them.
🔒 Execution Steps
1. Start Creating the Auto Scaling Group
- From the EC2 Dashboard, in the left menu, scroll to the bottom and select Auto Scaling Groups.
- Click on Create Auto Scaling group.
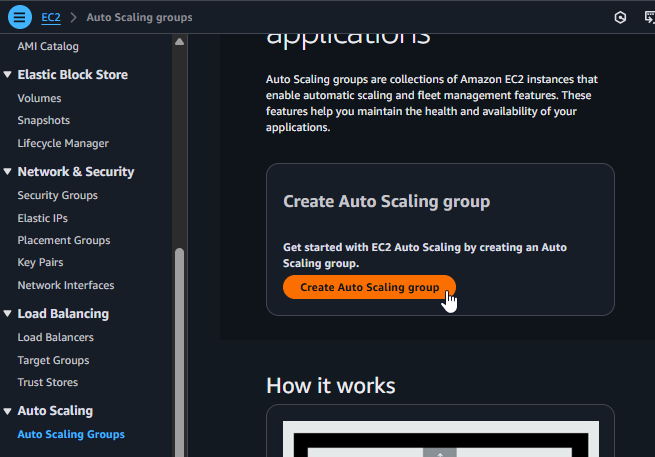
Starting to create an Auto Scaling Group
2. Set the Name and Choose the Launch Template
- Auto Scaling group name:
project-backend-asg - Launch template: Select
project-backend-lauch-templatefrom the list. - After selecting, click Next.
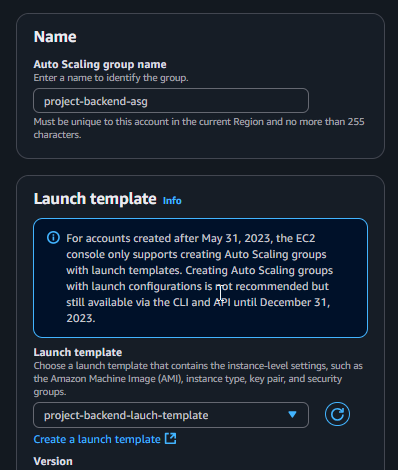
Choosing the name and Launch Template
3. Configure the Network
- VPC: Select
project-vpc. - Availability Zones and subnets: Select both Private Subnets we have. The ASG will use these subnets to launch new instances, ensuring they are protected and highly available.
- Click Next.
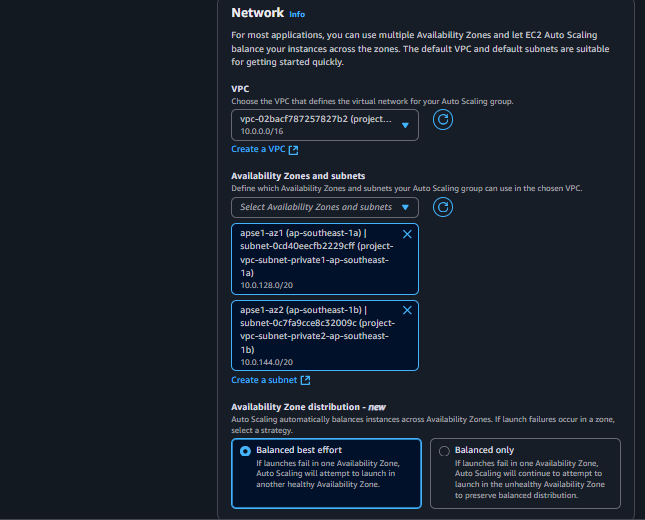
Configuring the VPC and Private Subnets
4. Integrate with the Load Balancer
- Select Attach to an existing load balancer.
- Select Choose from your load balancer target groups.
- From the dropdown list, select
project-backend-target-group. - Click Next.
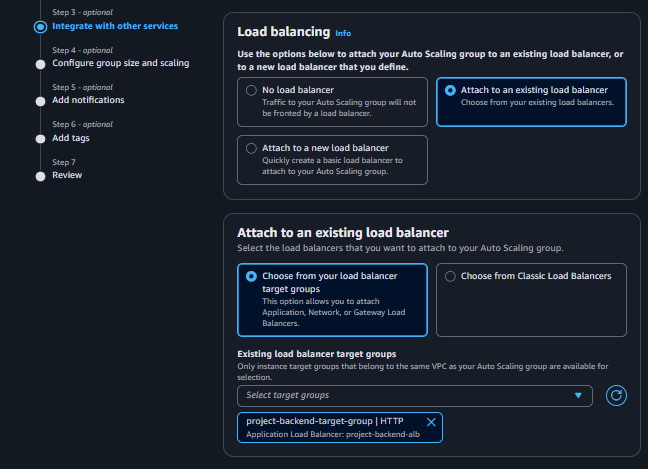
Attaching the ASG to the existing Target Group
5. Configure Group Size and Scaling Policies
Group size:
- Desired capacity:
1(The desired number of instances when the ASG is created). - Minimum capacity:
1(The minimum number of instances that must be running). - Maximum capacity:
2(The maximum number of instances allowed).
- Desired capacity:
Scaling policies:
- Select Target tracking scaling policy.
- Scaling policy name:
Target Tracking Policy - Metric type:
Application Load Balancer request count per target. - Target value:
30. (This means: if each instance has to handle an average of more than 30 requests per minute, add a new instance).
Click Next.
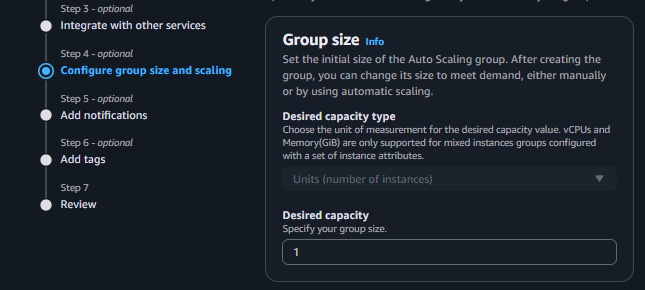
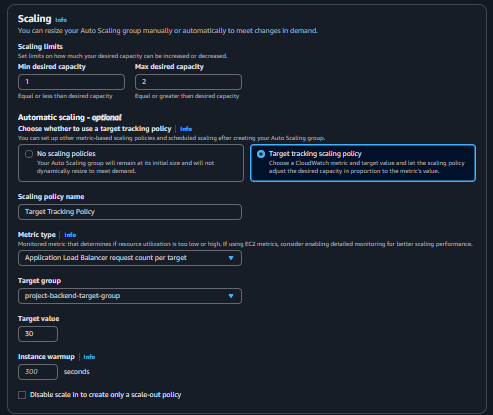
Configuring group size and scaling policies
6. Skip Optional Steps
- You will be taken to the Add notifications and Add tags pages. We do not need to configure them in this workshop.
- Click Next on both pages to skip them.
7. Review and Complete
- Review all the configured information on the Review page.
- Scroll down and click Create Auto Scaling group.
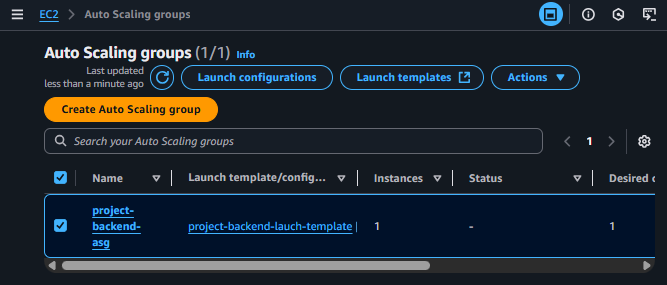
Reviewing and creating the Auto Scaling Group
8. Check the Status
- After creation, the ASG will appear in the list.
- Select
project-backend-asgand switch to the Instance management tab. - You will see the ASG is in the process of launching a new instance to meet the Desired capacity of
1. Wait until the instance’s Lifecycle isInService. This indicates the instance is ready and has been registered with the Target Group.